Preliminary operation
Before even understanding in practice how to create a free blog on google, using the platform Blogger, there are a couple of key pieces of information you need to be clear about.
For one thing, Blogger is a platform based on a CMS (or content management system), ie on a sort of "engine" that allows you to create blogs and websites from scratch and without having any kind of specific expertise. For this reason, it is possible to say with certainty that the Google blogging platform is designed especially for those who are not familiar with Web languages: through Blogger, in fact, it is possible to create a blog from nothing, with a few mouse clicks here and there. , within about ten minutes.
Furthermore, the advantage of Blogger also lies in its methods of use: the service offered by Google also includes in its “package” a dedicated Web space and a semi-personalized domain, through which it can be reached via the browser. Put simply, this means that you can create a blog with Blogger not only without having to know any programming language, but without even having to worry about buying hosting and a domain to host your web space.
All this, however, also has a slightly less pleasant side: since it is a proprietary platform and based mainly on ease of use, Blogger inhibits integration with advanced customization tools (e.g. through the installation of external plugins ) and allows extremely limited interventions on the code.
However, it should be emphasized that the personalization tools made available by Google are so many and allow you to intervene both on the graphic aspect of the blog, and on the functionality and structure of the various pages. Among other things, thanks to the close integration with the program AdSense, the advertising service offered by Google, all blogs designed with Blogger are designed for content monetization (I'll talk about it later in this guide).
Having said that, the time has finally come to get to work: as it is easy to guess, to open a blog on the Blogger platform it is absolutely essential to have a Google account. If this is the first time you are turning to a Google service, then it is time to do so.
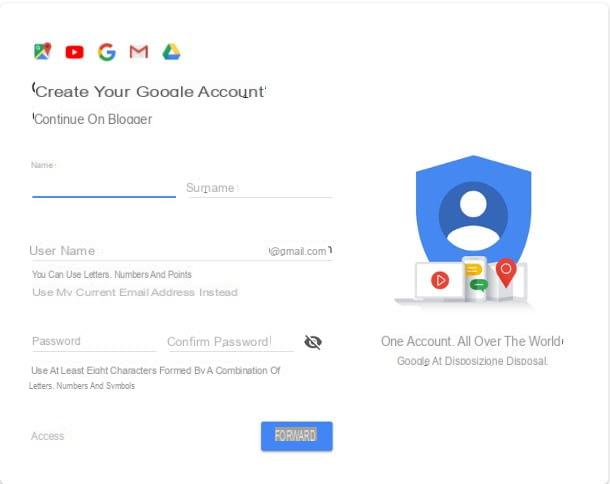
How? Very simple: first of all, connected to the main Blogger website, click on the button Create your Blog and, if you already have a Google account, enter your login credentials on the next screen, otherwise click on the item Create an account and fill out the form proposed with the information necessary for the creation of a new Google user.
In particular, you must enter yours in the appropriate text boxes name e last name, an username, And a Password: type this information, click on the button NEXT, specify your gender, date of birth, nationality and, if you wish, enter a alternative email address or valid phone number to be used for the recovery of credentials, if they are lost.
Once you have completed the form, press the button NEXT, put the check mark next to the boxes I accept the Google Terms of Service e I accept the processing of my data as described above and as explained in the privacy regulations e pigia sui pulsnti Create account e Confirmation to finalize the process and access the home page of the Blogger platform.
How to create a free blog on Google Blogger
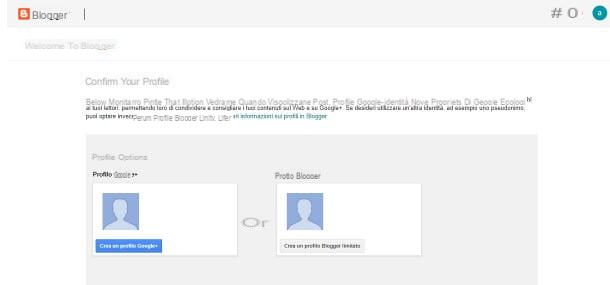
Once you have completed the registration for a new Google account, or after entering the credentials you already have on the Blogger home page, you are finally ready to create your personal blog.
Now, press the button Proceed to sign up for Blogger et voilà, that's it: without hesitating further, click on the button Create new blog to immediately start the creation of your new and personal web space.
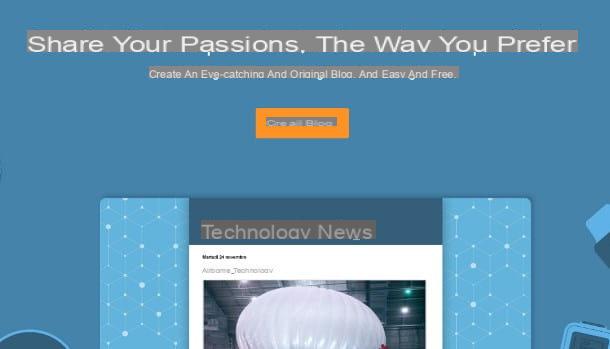
In the next steps, you will be asked to specify the basic information about the blog you are about to create: first, type in the appropriate text box the Title you want to assign it, then specify theAddress with which to make the site reachable (which will be something similar to namedelblog.blogspot.com) and choose the Graphic theme to be used among those proposed, by clicking on one of the previews available.
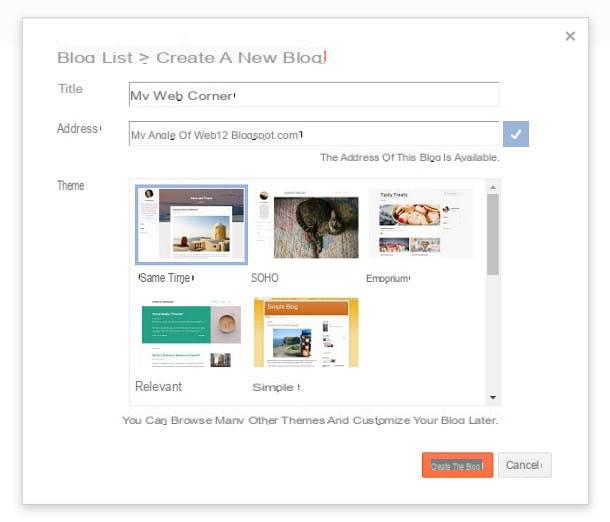
Don't worry if none of the initial themes catch your attention: as I intend to explain later, you have the possibility to change the graphics of your blog at any time.
Once you have made the choices you think are most appropriate, click on the button Create the blog to finalize the procedure and, if necessary, repeat the operation with the button No thanks to skip buying a custom domain: your little website is finally ready and just waiting to be filled and customized!
Create a new post

Now that you finally have your blog, it's time to get down to business and start posting new content: to begin with, click on the button New post placed at the top and use the built-in editor to write whatever you want.
The interface for editing posts is very similar to many other computer text editors that you will surely have had the opportunity to use: the text field at the top allows you to specify the Title of the article, while the resident push-button panel immediately below offers you access to both text formatting tools (font type, bold, italic, underlined, strikethrough and so on) and to those for inserting multimedia and non-multimedia contents (link, images, video, citations, lists, etc.).
On the right side of the screen, however, you can find the tools related to publishing content: you can insert labels to assign a theme to your post, use the Planning to automatically publish the content at a later time, edit the permalink of the post, set theLocation from which you publish it (or from the place you speak of) or access options advanced that allow, for example, to inhibit the publication of comments.
Once the article is complete, press the button Preview to see how this will look once published and, if you are satisfied with your work, press the button Public to insert the content on your blog in an "official" way. If you intend to leave the post pending without publishing it, and then resume it in the future, press the button Save and this will be stored as a draft.
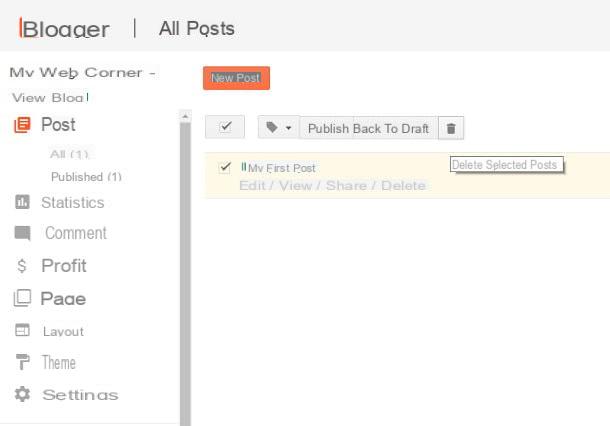
You can access the list of your blog posts at any time by clicking on its name located in the upper left corner of the page; if you want to delete a post, all you have to do is place the check mark in the box next to its name and click on the small button in the shape of basket resident at the top of the page. Easy, right?
Customize the blog

Pray che sei riuscito a create a free blog on google and also to insert the first contents, the time has come to understand how to customize and optimize it according to what your needs are.
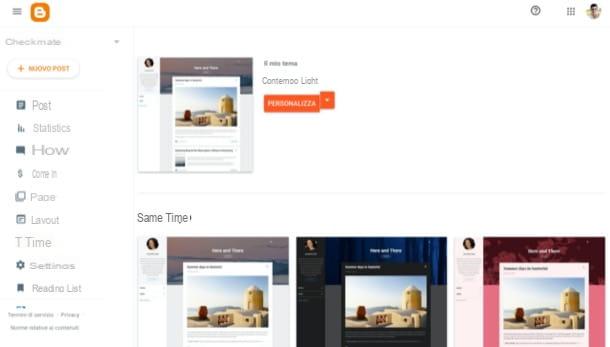
First, therefore, go back to the Blogger home page and press the button layout located on the left: through this section, you have the possibility to modify theicon favorite of the blog (ie the "thumbnail" that appears in the browser tabs, next to the page name, when someone visits the site) and to add or remove gadgets, i.e. additional elements designed to enrich both the structure and the graphics of the blog pages (eg search bar, a box containing the personal informations, A 'image, a section of HTML / JavaScript code custom and so on).
To edit the content of a gadget, simply click on the icon in the shape of pencil corresponding to its square; to move it from one part of the site to the other, you simply have to "grab" the relevant box with the mouse and drag it to the section of the page that best suits you.
Once the changes are complete, you can preview the final result by clicking on the button Preview placed at the top: when you are satisfied with your work, all you have to do is press the button Save arrangement to make the changes effective.
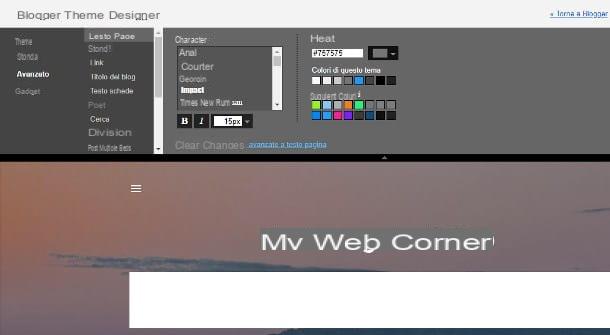
As I mentioned in the previous section, you can customize the blog theme, if you wish, and change it whenever you want: to do it, click on the item Subject present on the main page of Blogger, choose a new graphic theme for your blog by selecting it from the previews proposed, or press the button Customize to change the background, the formatting of the characters for each single section, the color combinations of the entire blog or the "shape" of the gadgets related to the theme in use.
With each change, Blogspot will take care of creating a real-time preview of the appearance of the blog: once you are satisfied with your work, all you have to do is click on the button Apply to blog placed at the top. To return to the site management page, simply click on the link Back to blogger.
Within the aforementioned page, in addition to the customization tools, you can find other sections relating to the management and maintenance of your Web space: below I will briefly illustrate the content of each of them.
- Post - by clicking on this section you can access the list of published contents.
- Stats - allows you to view some summary graphics relating to visits to the site. It is a particularly useful tool for monitoring the progress of content, understanding what type of users they attract and refine publishing strategies.
- Post comments - this area contains the list of all comments received on the blog and offers basic moderation functions (eg approval of comments, deletion of the same and reporting spam).
- Profits - this is the section relating to blog monetization: I will tell you about it in a slightly more in-depth way in the next section.
- Pages - allows you to create "static pages" to be included in the blog. This is a particularly useful feature if you intend to create a blog that acts as a "showcase".
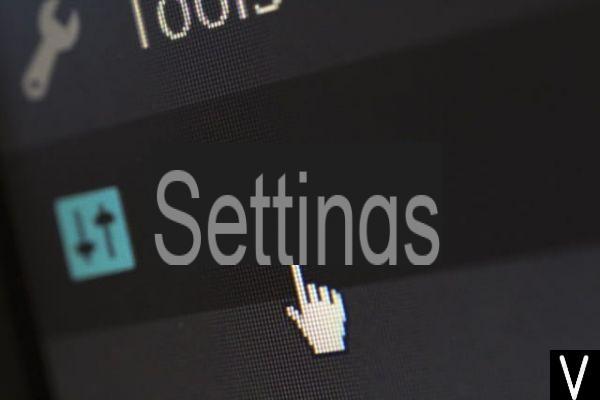
- Settings - in this section you can change the blog settings, such as title, description, blog privacy and address, number of posts to show on the main page, position of the comment box, moderation settings of the same, language and many other fundamental aspects of the website.
Monetize the blog
If you have come this far, it means that you have perfectly mastered the procedures to be carried out for create a free blog on google and fill it with the content you want. I imagine that, at this point, you are wondering if you can derive some small economic advantage from your nascent passion: well, the answer is absolutely yes ... but with some clarifications to be made.
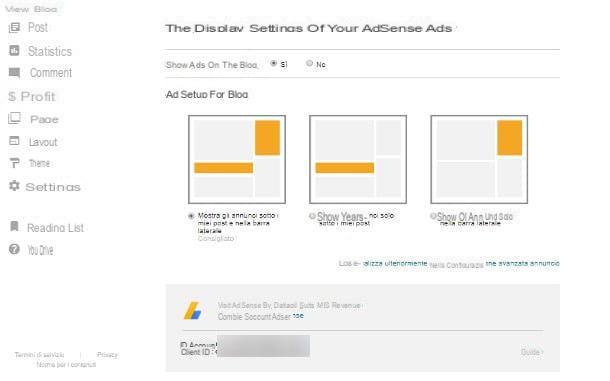
First, to monetize your blog you must be enrolled in the program Google AdSense: if you have never heard of it, this is the Google advertising service reserved for blog and website managers which, at no cost, allows you to publish advertisements between the pages of the latter and earn through clicks made by visitors . If you intend to make money with your blog, it is absolutely essential that you subscribe to this service and know how it works in detail: in this regard, I strongly urge you to consult my in-depth study on how to make money with AdSense.
Secondly, to activate monetization on Blogger, it is absolutely essential that the blog for which it is requested has some basic requirements: first of all, it must be active by at least 6 months and must be managed by a person who has reached the age of majority. In addition, the content published on the blog must comply with the AdSense program rules: here are some fundamental aspects to be respected in order not to break them.
- The contents of the site must not in any way induce the reader to click on the ads (eg "click on the banner above").
- The contents of the site must not deal with pornographic material, shocking, inciting violence, bullying and / or racial discrimination, must not invite the user to carry out illegal practices (e.g. the download of copyrighted material or the sale of drugs, weapons, counterfeit items or prescription drugs), must not sponsor adware, viruses or other types of malware and, in general, must not promote illegal activity or violate the legal rights of third parties.
- Ads must be recognizable within the content.
If you believe that your blog has the basic requirements for monetization with AdSense, you can integrate with Blogger in a very simple way: all you have to do is click on the item Profits and follow the on-screen instructions to activate monetization and choose how ads are displayed on the page. If your blog does not meet the requirements for integrating with Google advertising, an appropriate error message will be shown.
How to create a free blog on Google