Create a Facebook event from your computer
If you are interested in understanding how to proceed in order to create an event on Facebook, the first thing you need to do is log in to the social network. To do this, type www.facebook.com in the address bar of your favorite web browser, fill in the fields Email or phone e Password located at the top of the Web page that you view by entering your login details to the social network and then click on the button Log in.
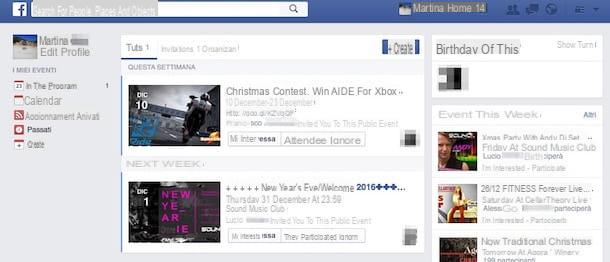
Now that you are logged in to the social network press on the voice Events which is located in the left sidebar on the Facebook home page and, on the page that opens, click on the gray button located at the top right + Create to start creating a new event.
At this point, all you have to do is fill in the form that is proposed to you with all the information relating to the event you want to invite your friends to. Then set a name for the event by filling in the field next to the item Event name (Eg My birthday), indicate the place where you want the event to take place by filling in the field next to the item Location, specify the date and time you want the event to take place by filling in the fields next to the item Date hour and eventually indicates the end time by pressing on the item + end time then fill in the field next to the item Description typing a description of the event (for example Party organized for my birthday). If you wish, leave the check mark next to the item Guests can invite their friends to allow those you invite to the event to invite their friends in turn.
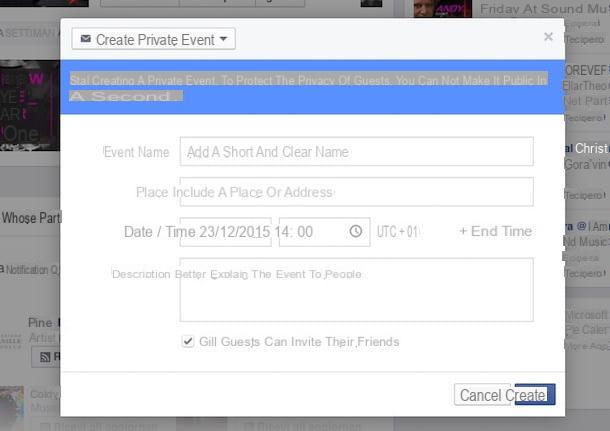
Then indicate whether you want the event you are about to create to be private or public in nature. To do this, press the drop-down menu located at the top of the module displayed on the screen and select the item Create private event, to make the event visible only to some people, or select the item Create a public event, to make the event visible to everyone both on Facebook and outside of Facebook. By default, every time you go to create an event on Facebook the option is already selected Create private event.
Once you have done all these operations click on the button Crea blue which is located at the bottom and wait a few moments for the event on Facebook to be created and the page for managing it to be visible.
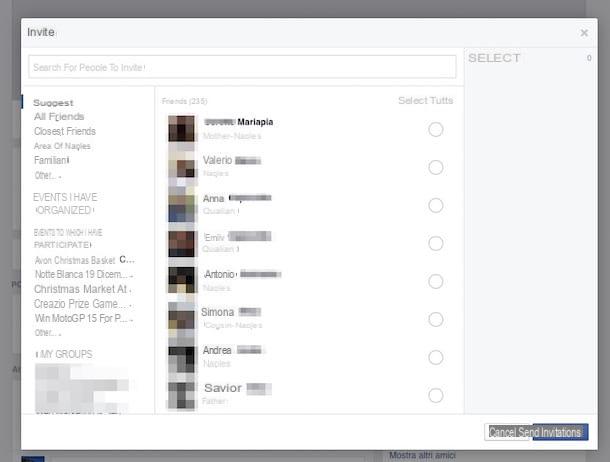
After viewing the Facebook page through which to manage the newly created event, presses the button Invite to invite your friends on the social network to participate in the event. In the form that will be shown to you at this point, select the friends you want to invite to the event and then press the button Send invitations placed at the bottom. If you cannot identify a specific friend to invite you can search for him by typing his name or surname in the appropriate field Look for people to invite placed at the top or you can filter your friends by category by pressing on the items in the side menu.
Once the invitations have been sent, the friends invited to the event will see a special notification appear in the Facebook notification area and by pressing on it they can choose whether to accept to participate or not by clicking on the buttons I care, I will participate or Ignore. To keep track of the number of friends who will participate, the number of users in doubt and the total number of guests to the event, connect to the main page for managing it by pressing on the name of the event you created from the section Events of the left column attached to the main Facebook page and take a look at the appropriate section located on the right.
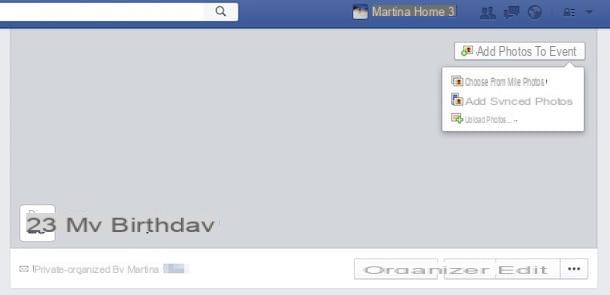
If after creating an event on Facebook and after inviting your friends you want to make the page used for managing the event even more beautiful, as well as the invitation for the event itself, I suggest you add a representative image. To do this connected to the page through which to manage the event and then click with the mouse on the item Add photos to the event. Then choose whether to use an image from those already available on your Facebook account, whether to use a synchronized photo or whether to upload photos from your computer by pressing, based on the choice made, on the items in the menu displayed on the screen Choose from my photos, Add Synchronized Photosae Upload photos ....
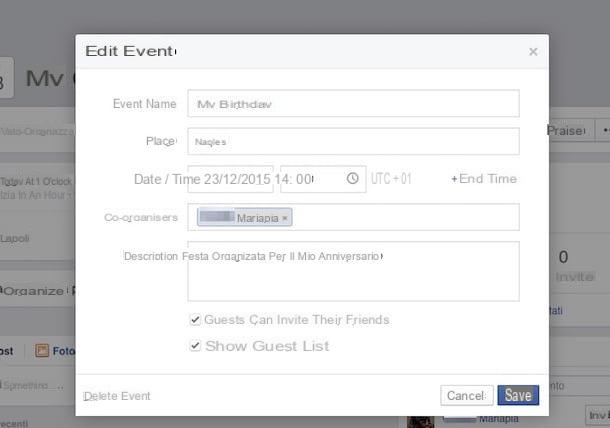
Keep in mind that despite having proceeded to create an event on Facebook in case of second thoughts you can always and in any case cancel it. To do this, just press the button Modification attached to the page used for the management of the event, click on the item delete event placed at the bottom left and then on Confirmation.
Always pressing the button Modification you can make any changes to the name of the event but also to the place, date, time and description. By filling in the field located next to the item instead Co-organizers you can choose to nominate one or more of your co-organizer friends of the event in order to have helpers in the management of the event. Ultimate all the changes presses the button Save.
Create an event on Facebook from smartphones and tablets
If it is your intention to understand what needs to be done in order to create an event on Facebook by acting directly and comfortably from your smartphone or tablet, the first operation you need to do is to press the icon of the official app of the famous social network on the home screen. of your device.
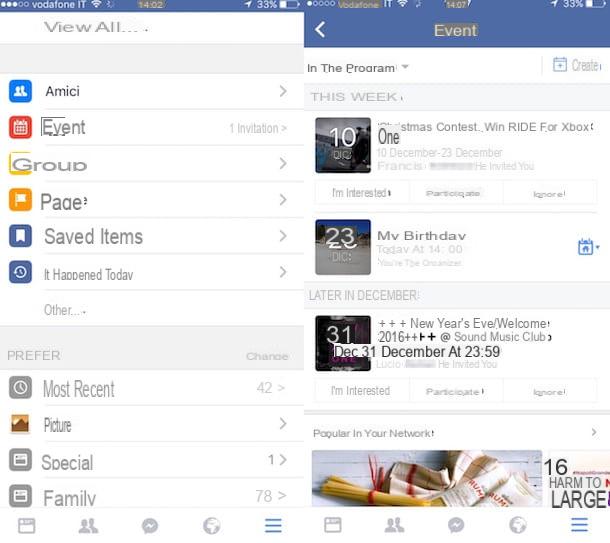
Once the main Facebook screen is displayed, tap on the icon depicting three horizontal lines which is located on the right and then presses on the item Events. At this point, tap on the item Crea present at the top and then fill out the form that is shown on the screen by typing the title of the event (for example My birthday), time and place. If necessary, provide further information by filling in the field More information, leave it on if you wish ON the lever next to the item Guests can invite their friendsi to allow those you invite to the event to invite their friends in turn and then type the names of the users you intend to appoint as co-organizers by filling in the field Co-organizers.
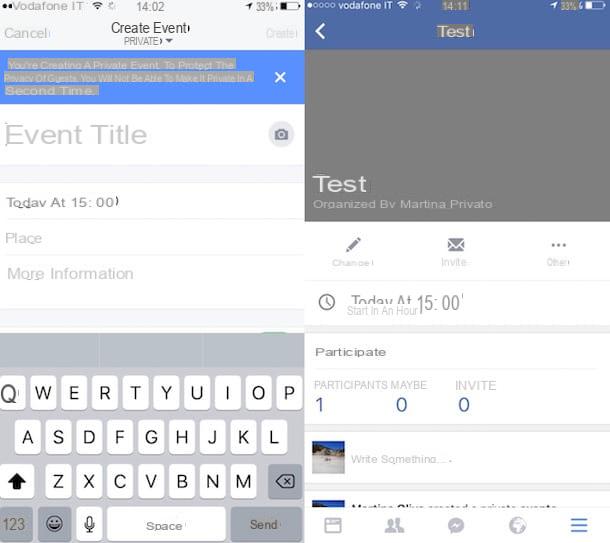
If you prefer to make the page used to manage the event that will be created more beautiful, as well as the invitation for the event itself, I suggest you add a representative image. To do this, press the button depicting a camera that you find located at the top and then tap on Upload a photo. As an alternative to the photo you can choose to select a theme for your event by pressing on the item Pick a theme attached to the displayed menu.
Also indicate whether you want the event you are about to create to be private or public in nature. To do this, press the menu located at the top of the module displayed on the screen and select the item Create private event to make the event visible only to some people or select the item Create a public event to make the event visible to everyone both on Facebook and outside of Facebook. By default, every time you go to create an event on Facebook the option is already selected Create private event.
Once all these steps have been carried out I would say that we are there and that you can finally proceed with the actual creation of the event. To do this, tap on the item Crea located at the top right.
Now that you have managed to create an event on Facebook from mobile you can take care of the eventual management of the same attendant to the indications that I have given you in the previous lines when I have explained to you everything that is possible to manage a newly created event on Facebook by acting as computer. The steps to be carried out are practically identical.
How to create an event on Facebook