Banner Maker Pro (Windows)
A delle prime soluzioni che ti consiglio di provare per create banners is called Banner Maker Pro: is a software available for Windows specifically designed to create advertising banners and other graphic elements to be used for websites, blogs, social networks, etc. through a very intuitive interface that facilitates its use. The software is paid (costs $ 39,99), but is available in a free trial version (in which a watermark is applied to your work) that allows you to test all the features for a period of 15 days.
To download Banner Maker Pro, connect to the program's website and click on the button Download Banner Maker Pro Free Trial. When the download is complete, open the file .exe just downloaded and follow the wizard to complete its installation: click on the button Yes, by pressing the button Next, check the item I accept the agreement, click the button again Next for four consecutive times and then on install e Finish.
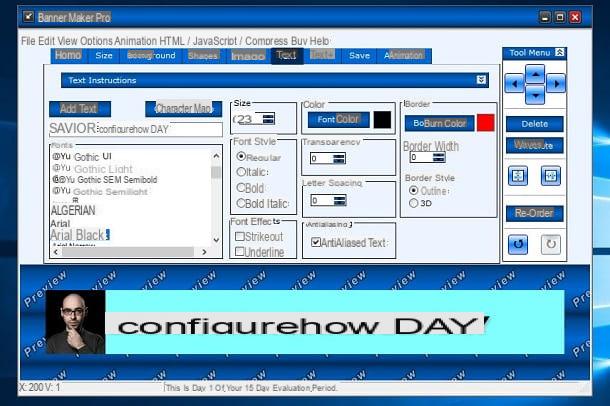
After installing and launching Banner Maker Pro, click on the button Start Banner Maker Pro in order to start the software trial. Then click on the button New and then use the tabs located at the top of the window to customize the banner: click on the tab Size to choose the format and dimensions of the banner; on the board background to change its background; on the board Pictures to add images (you can insert both images made available by the program and import those saved in the PC); on the cards Text e Text + to enter text and customize its appearance and click on the tab Animation to make the banner more attractive by adding an animation.
As soon as you are satisfied with the result, click on the item Save from the menu Fillet and export the work in one of the available formats (eg. GIF, PNG, JPG, etc.). Did you see how easy it was to use Banner Maker Pro?
GIMP (Windows / macOS / Linux)
Did the solution I indicated in the previous paragraph not satisfy you? In that case I recommend that you give it a try GIMP, a very popular free and open source image processing program that is considered to be the best free alternative to expensive Photoshop. It offers a wide variety of tools that are sure to be useful for creating custom banners.
To download GIMP to your computer, click here in order to connect to the program's website, click the button Download xxxx and then on the button Download GIMP xxxx directly, which is located on the right of the page, under the heading GIMP for [name of your PC's operating system].
When the download is complete, open the file you just downloaded from the GIMP website and follow the simple installation procedure that is shown on the screen: if you are using a PC Windowsclick on your button Yes and then OK, Install e end.
If you use a Macinstead, drag the GIMP icon into the folder Applications macOS, right-click the program icon and, from the menu that appears, select the item apri (you need to perform this procedure only when starting GIMP for the first time, in order to “circumvent” the restrictions applied by Apple to software from non-certified developers).
After installing and starting GIMP, click on the entry New ... from the menu Fillet, specify the size of the banner you want to create and click the button OK. Alternatively, use one of the banner templates provided by GIMP: open the drop-down menu models (always located in the window Create a new image), select one of the available models (eg. Web banner common 468 × 60, Web banner huge 728 × 90, etc.) and click on the button OK.
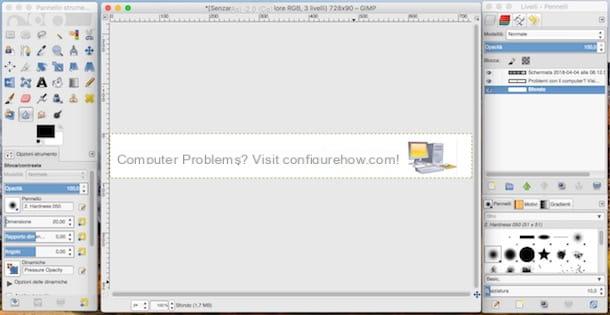
After defining the dimensions of the banner, use the tools in the toolbar located on the left to customize it: then use it Testo instrument to add the text you want to display in your banner; use the Color tool to change its background color; use it Pencil tool to make a drawing or hand lettering and so on.
If you want to add an image to the banner, drag it into the main GIMP window and then resize it using the Tool ladder: you must first select the level related to the image just added to the project, then recall it Scale tool from the toolbar, change the size of the image selected from the box that appears on the screen and then click on the button Ladder.
As soon as you are satisfied with the result, export the image you just created by clicking on the item Esporta eats… from the menu Fillet and select the format you prefer the most (eg. PNG). If you are interested in creating animated banners with GIMP, know that it is possible to do it thanks to the function for the creation of animated images integrated in the program. If you want to deepen the subject a little more, I invite you to read the tutorial in which I explain in detail how to animate images with GIMP: there you will find all the information you need to proceed.
Bannersketch (Online)
Would you like to create banners directly from the browser, without installing any program on your PC? In this case you can contact online services that allow you to complete this kind of work, such as Bannersketch, which is very easy to use and, what's more, it's completely free.
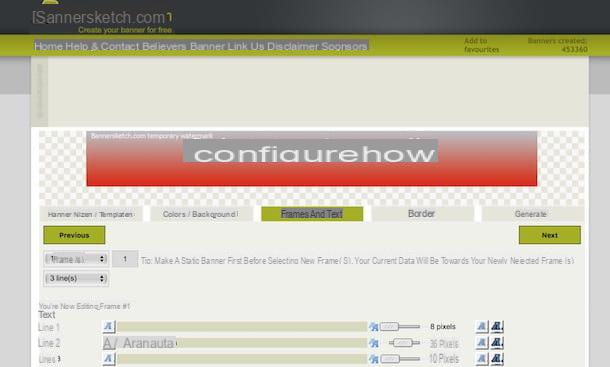
To use it, connected to its home page, select the format of your banner from those proposed and, in the window that opens, click on the button OK. Now that you have chosen the type of banner you want to create, proceed to customize it: change the background color using the items Color top e Color bottom and select the colors you prefer most from the boxes that appear on the screen. Alternatively, you can upload your own image and use it as the background of the banner by clicking on the button Use a Custome Background.
After changing the background, click on the tab Frames and text present at the top and enter the text you want to appear in the banner: replace the phrase -IMPORTANT- YOU CAN EDIT / REMOVE THESE TEXT LINES (relating to line 1) with your custom text. Next, click on the icon A on the left to select the font to use and move the cursor located next to the A on the right to choose the font size. If you want to insert other writings, repeat the same procedure for the line 2 e line 3.
At this point, click on the tab Border and, on the page that opens, select the border you want to insert in the banner by selecting its color and size using the functions Color e Border width.
As soon as you have finished your work, all you have to do is get the code to insert it directly into your website. Then open the tab Generate, fill in all the empty fields of the displayed page with the required data and, to conclude, click on the button Generate and send my banner. You will receive the embed code by email - easier than that ?!
Bannersnack (online)
Another online service that can be useful for you to create banners is Banner snack, which offers a wide choice of predefined templates (for the record, more than 1.000) and gives the possibility to export them in JPG, PNG and GIF formats. Another interesting feature of Bannersnack is the ability to embed banners created on your website and monitor their statistics.
Before explaining how this service works, I would like to tell you that the free version has some limitations: you can create up to 10 banners for free which are marked with a watermark. To break down these limits it is necessary to subscribe to the Premium subscription, which starts at $ 7 per month. For more information about the subscription plans available, see the dedicated page on the Bannersnack website.
To create banners with Bannersnack, connected first to the home page of the service, click on the button free subscription located at the top right and create your free account via your address email, your account Facebook or your account Google, by clicking on the corresponding buttons. Once logged in, fill out the short questionnaire that you see on the screen indicating if you are a designer, an marketer, an entrepreneur, a developer o none of these.
On the page that opens, then click the button Make a Banner located under the option Single banner (the "Banner set" option is available only for subscribed users) and select the type of banner you want to create from those proposed in the tabs Most popular, Display e Social media (Eg. Large Rectangle, if you want to make a 336 x 280 banner; YouTube Channel cover, to create a banner optimized for a YouTube channel, etc.). If you would like to create banners with custom size, click on the option Custom size and enter the measurements in the fields Width e Height.
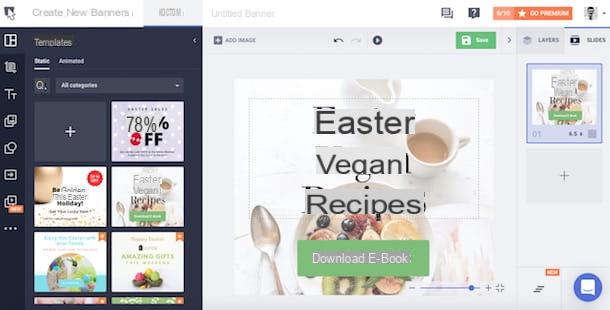
Once you have selected the type of banner you want to create, you will have access to the Bannersnack editor. Proceed, therefore, to the actual creation of the banner by clicking on one of the buttons in the toolbar located on the left: template, to apply a predefined layout; background, to set the background color of the banner; Add text, to insert customized texts and writings; Add button, to add buttons linked to a specific action that is performed when the user clicks, and so on.
Through the sidebar on the right, however, you can act on the levels of your work and add slides to animate the banner. As soon as you have finished your work, click on the button (▶ ︎) to see a preview and, if you are satisfied with the final result, save the banner you just created by clicking on the green button Save.
In the box that opens, enter the banner name in the text field Banner name; enter the URL that should be opened when clicking on the banner in the text field URL banner and click on the entry Set border and quality to define the borders of the banner and the quality of the image. To conclude, click on the button once again Save And that's it.
To download the banner you created, click on the item My banners (located at the top), make the mouse cursor stay on the banner preview, click on the symbol of arrow pointing down and choosing one of the formats available for export (PNG, JPG o GIF). To embed the banner directly on your website without downloading it, instead, click on the symbol (...), select the voice Embed from the menu that opens, copy the code by clicking on the button Copy embed code and then paste it into the section of your site where you want it to appear.
Other useful solutions to create banners
Haven't the solutions I proposed to you in the previous paragraphs satisfied you that much? Don't lose heart and take a look at the services listed below. I'm sure you will find someone who can do for you.
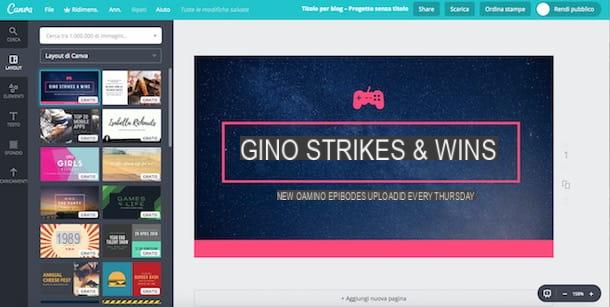
- canva (Online / Android / iOS) - is a very famous platform for creating graphic projects of various kinds that can be used after free registration. It offers tons of templates and graphics, most of which are free.
- BannerFans (Online) - is a free Web service that allows you to create customizable banners by adding text, images, graphic effects, borders and so on. Your works can be exported in various formats (PNG, JPG or GIF), no watermak is applied and the service allows you to obtain the code with which to embed the banner directly on your site.
- Banner generator (Online) - this is a free online service that offers lots of templates to start with to create custom banners and allows you to export in JPG, PNG or SVG formats.
- Creabanner (Online) - this online service can be used without registration and allows you to create personalized banners in a few clicks. The works created can then be exported in the form of an image and / or imported on your website by copying and pasting the code that is generated by the service itself. Creabanner can be used for free, but to remove the watermark applied to your works you have to make a donation of 3 euros.