Jumplist Launcher
The first solution I recommend you try is Jumplist Launcher: it is a free program that allows you to create custom jumplists with folders and files of all kinds in all the most recent versions of Windows (from 7 onwards). It requires no tedious installation procedures and is incredibly easy to use - here's how it works.
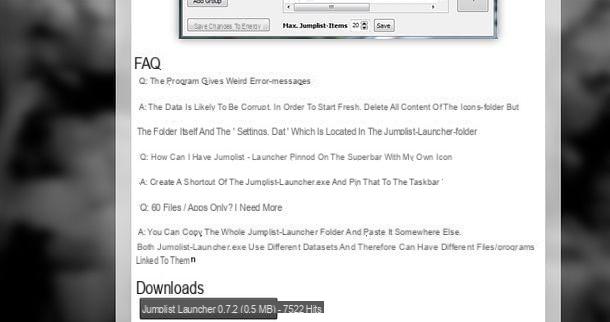
The first step you need to take is to connect to the Jumplist Launcher website and click on the button Jumplist Launcher 0.7.2 (0.5MB), found at the bottom of the page, to download the program to your PC.
Once the download is complete, double-click on it to open the archive you just downloaded ( Jumplist_Launcher_0.7.2.rar) and extract the contents to any folder (except for network paths, which would then make it impossible to activate the custom jumplist). To open archives in RAR format, use one of the programs I recommended you in my tutorial on how to open RAR files.
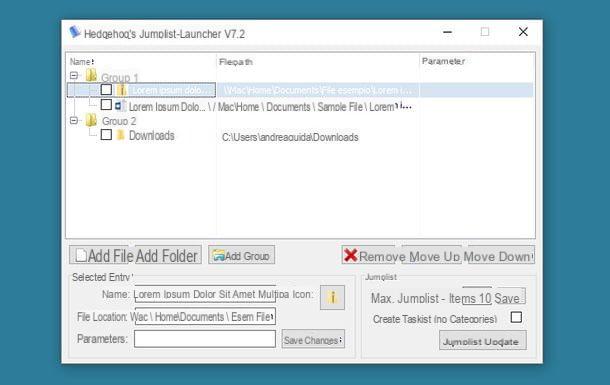
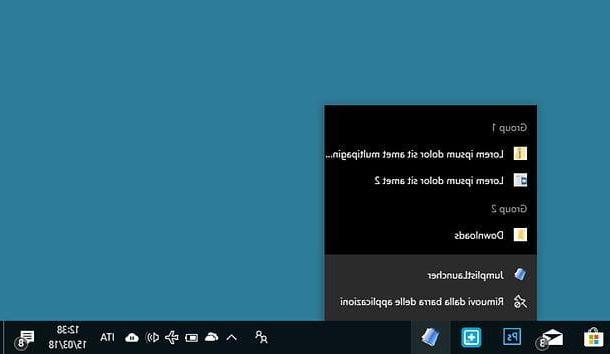
Now, start the program JumplistLauncher.exe and, in the window that opens, select the elements you want to appear in your custom jumplist. Then click on the button Add File, to add new files to the jumplist, on the button add Folder, to add a folder to the jumplist, or on the button Add Group, to add a new group of items to the jumplist.
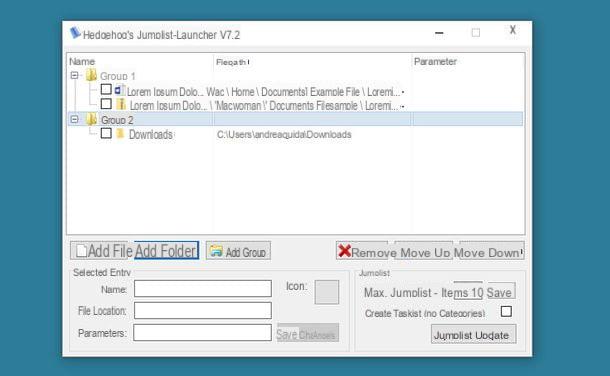
You can change the names and icons of the files and folders added to the jumplist, by clicking on the items related to the latter and using the commands located in the lower left part of the window. Then click on the button located next to the item Icon, to change the icon of an item, type the name you want to assign to the selected file or folder in the text field next to the item Nameand click on Save Changes, to save the changes made.
To change the order of the elements inserted in the jumplist, all you have to do is select the items related to the latter and click on the button Move Up, to move the file or folder above, or to the button Move down, to move the file or folder above. If you want to delete a file or folder from the jumplist, just click on it and press the button remove.
Through the field Max. Jump list items (bottom right), you can instead set the maximum number of elements that can be added to the jumplist. But be careful, the change will not only affect the Jumplist Launcher jumplist, but the jumplist of all programs, which at that point will contain more or less recent files (depending on the value you entered in the "Max. Jumplist-Items" field) .
When you have finished adding files, folders and groups to your jumplist, save it by clicking on the button Update jumplist and close the program window. Then drag the program JumplistLauncher.exe in taskbar Windows (the one at the bottom of the screen), to make the icon of the customized jumplist appear in the latter, and that's it.
Selecting the icon with the right mouse button, you will access the jumplist. Selecting it with the left mouse button, you will instead access the main window of Jumplist Launcher. Very easy!
Jumplist Extender
If for any reason Jumplist Launcher doesn't satisfy you, you can give it a try Jumplist Extender: another free program (as well as open source) that allows you to create customized jumplists on Windows. Its operation is not too dissimilar to that of the software mentioned above, even if unlike the latter it requires the choice of a specific program on which to base the jumplist. Now I'll explain how to best use it.
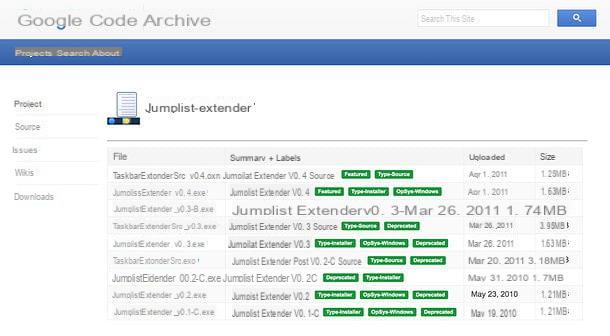
The first step you need to take is to download Jumplist Extender on your PC. Then connect to the official website of the program and click on the item first Downloads located in the left sidebar and then on the link JumplistExtender_v0.4.exe present on the page that if you press.
When the download is complete, start the file by double clicking on it JumplistExtender_v0.4.exe And, nella finestra che si apre, clicca prima sul sul pulsado Yes and then Next.
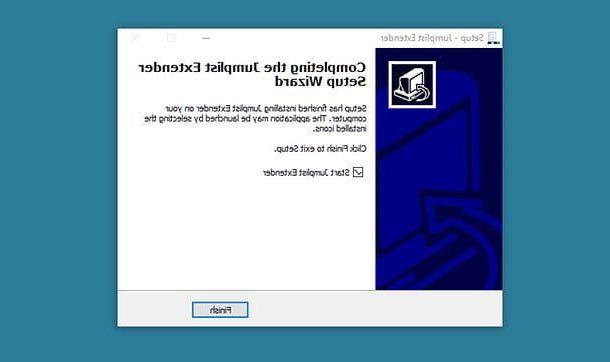
Then put the check mark next to the item I accept the agreement (to accept the conditions of use of the software) and complete the setup by first pressing on Next for four consecutive times and then on install e Finish.
If you are asked to install the . Net Framework 3.5 (a free component necessary for the proper functioning of Jumplist Extender), accept by clicking on the button Download and install this feature. Windows will automatically download and install all the files necessary for the software to function correctly.
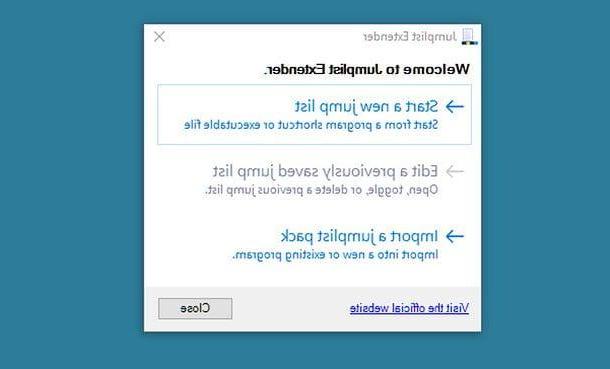
You are now ready to take action! Then start Jumplist Extender using its icon in the menu Home Windows and click on the button Start a new jump list to start creating a new custom jumplist.
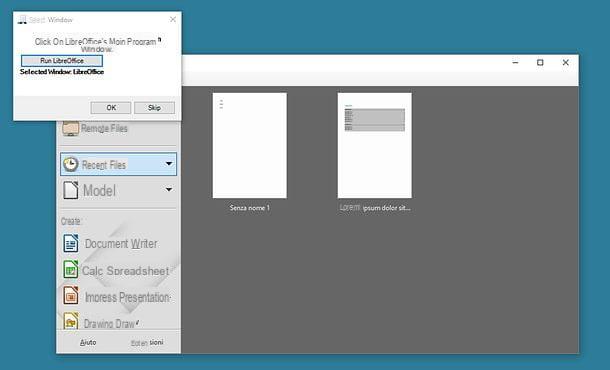
In the window that opens, select the program to which you want to associate your custom jumplist by selecting it from the folder Programs of the PC (or any other folder), then click on the button Run [program name] and wait for the software to start. Then click on the program window you just opened (for my example I used LibreOffice) e pigia sul pulsating OK of Jumplist Extender to go to the creation of the jumplist.
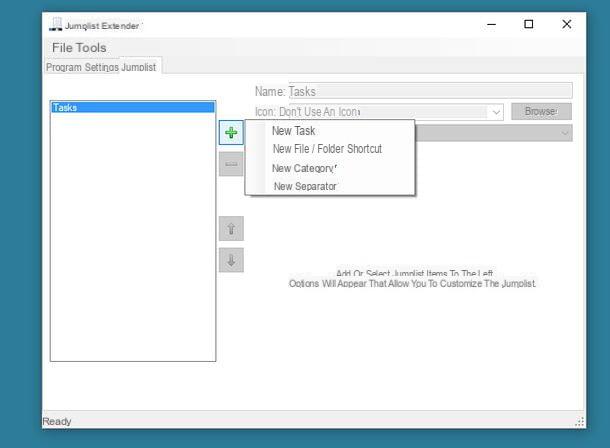
At this point, select the tab Jumplist from the main window of Jumplist Extender, press the button [+] which is on the left and choose the type of content to add to your jumplist: New task for a new action (e.g. pressing certain keys on the keyboard or executing a command via Prompt), New File / Folder Shortcut to add a link to a file or folder; New Category: to add a new group of icons or New Separator to add a separator.
Once you have made your choice, you have to fill in the fields that are proposed to you by the program with the information relating to the contents you want to insert in your jumplist.
- If you have decided to add a category, then a group of links, you must type the name to be assigned to it in the field Name.
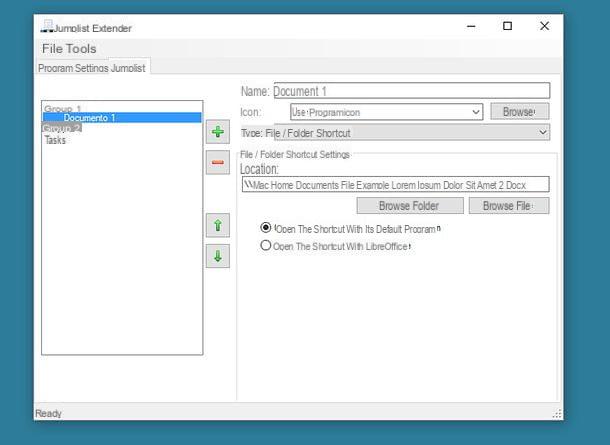
- If you have chosen to add a link to a file or folder, you have to select the object to link via the button Browse folder (in the case of folders) or via the button Browse file (in the case of files), type the name to be displayed in the jumplist in the field Name, set the icon to use for the latter (via the Icon) and choose whether to start the file or folder with its default program (option Open the shortcut with its default progam) or with the program used as a program to create the jumplist (option Open the shortcut with [program name]).
- If you have chosen to add a task, you have to choose, via the drop-down menu Action, whether to create a script to simulate keyboard key presses (Send keystrokes to window), whether to start a command or program (Run command line or program) or whether to run an AutoHotKey script (Run AutoHotKey script), and then type the relative instructions in the fields below and the name to be assigned to the element (in the field Name).
- If you have decided to add a separator, you don't have to do anything.
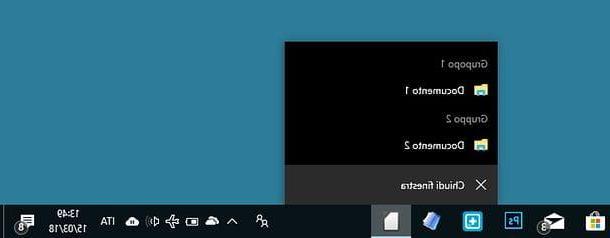
Once you've added all the elements to your jumplist, reorder them using the buttons with the up arrow and down arrow that are on the left and save the list by selecting the item Save and Apply to Taskbar from the menu Fillet (top left).
Mission accomplished! Now you just have to fix the program you have chosen as the basis of your jumplist in the taskbar (just drag it into it) and enjoy your personalized list. How? Simple, by doing click destroy on the program you have chosen as the basis for making it.
If you want, you can modify the jumplists created with Jumplist Extender by starting the latter by clicking on the item Edit a previously saved jump list and selecting the name of the list from the window that opens.
After making changes, to save the changes, all you have to do is select the item Save and Apply to Taskbar from the menu Fillet (top left). Simple, right?
How to create custom jumplists