Repartition the hard disk on Windows
A PC equipped with Windows, can do the partitioning of the hard disk relying on various solutions: one is included directly in the operating system, others can be found for free on the Net. Choose the one that best suits your needs and use it following the instructions I am about to give you.
Disk Management
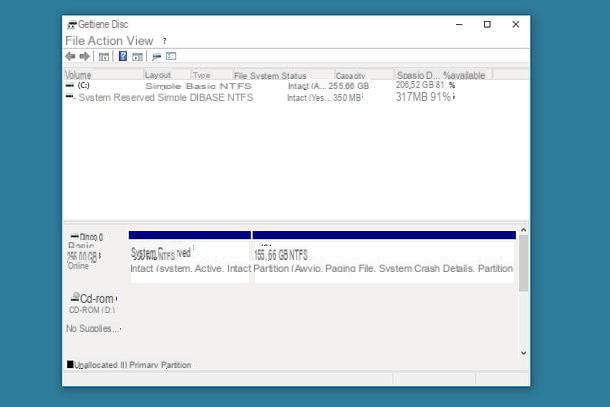
Disk Management is the Windows default disk management utility. It allows you to manage mechanical hard disks and SSDs by creating, deleting and modifying the partitions of the latter. To start it on your PC, click on the button Home Windows (the flag icon located in the lower left corner of the screen), search for the term "partitions" in the menu that opens and select the item Create and format hard drive partitions from the search results.
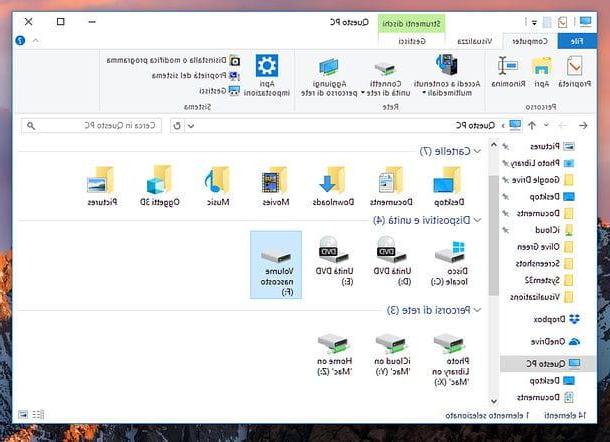
In the window that opens, you will find the list of volumes present in the PC (or connected to it) at the top and the boxes relating to the existing partitions at the bottom. To change partitions, you have to right-click on the boxes that concern them and select one of the options in the menu that is proposed to you.
Assuming you now have only one partition (C:) in which there are operating system, programs and data, what you need to do is reduce the size of the latter, get some unallocated space (i.e. free space to be reused for creating new volumes) and create a partition for the data.
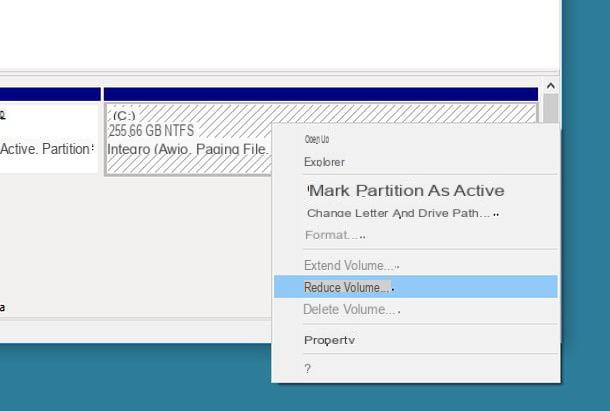
Then click with the right mouse button on the box relating to partition you want to shrink (presumably C:), select the voice Turn down volume from the menu that appears and wait a few seconds for the disc structure to be examined.
In the window that opens, use the field Specify the amount of space to shrink, in MB to specify the space you want to reserve for the new partition to be created (you have to choose, in any case I would recommend 60% for operating system and data and 40% for data) and click on the button Reduce to start reducing the volume.
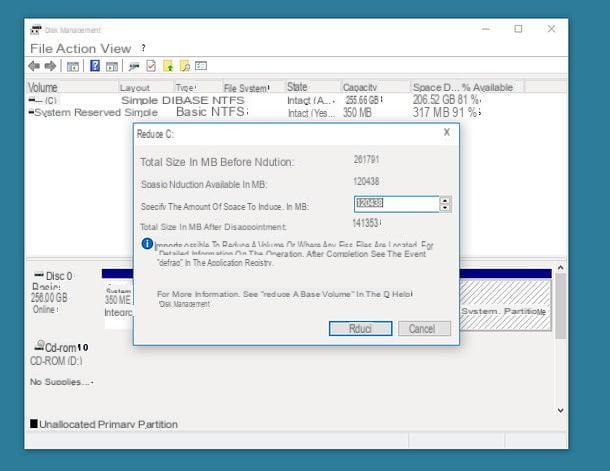
At the end of the operation (which should take a few seconds), a black box relating to the will appear in Disk Management unallocated space, then to the free space to use to create the new partition.
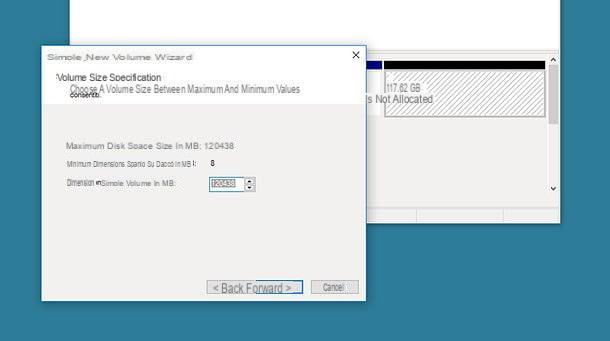
To create the new partition, right click on the black box for the disk portion not allocated and select the item New simple volume from the menu that opens. In the window that appears later on the screen, press the button NEXT and use the field Simple volume size in MB to indicate the amount of unallocated space to be exploited for the creation of the volume (personally I recommend that you use all the unallocated space you obtained earlier). Then click on the button NEXT I will continue.
Now you have to choose the drive letter to be assigned to the new partition using the appropriate drop-down menu, then click on the button NEXT and you have to choose the name to assign to the partition (field Volume label) And the file system to use to format it: I advise you to choose NTFS if you don't need to share the partition with other systems, otherwise choose exFAT.
Once you have also adjusted these preferences, click on the buttons NEXT e end and your new partition will be created in seconds.

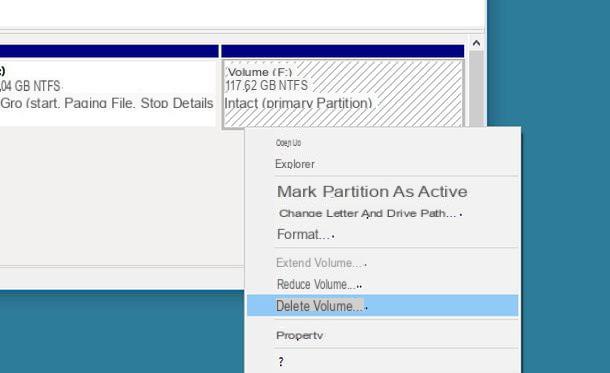
In case of second thoughts, you can delete a previously created partition by right clicking on the box that concerns it, selecting the item Delete volume from the menu that opens and confirming (thus answering Yes notice that appears on the screen).
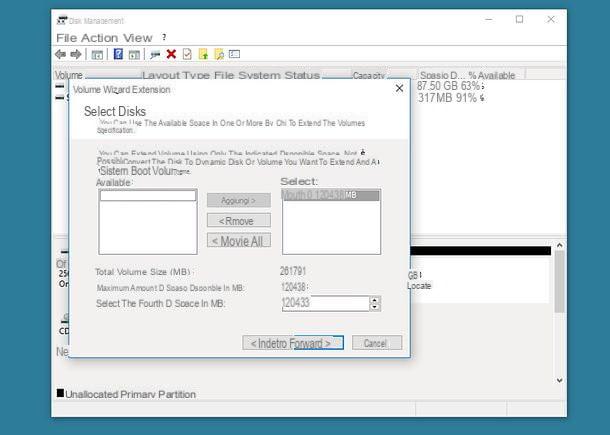
Once you delete a partition, you will get new unallocated space to be merged with the remaining partitions. To add unallocated space to an existing partition, right-click on the box for that partition and select the entry Extend Volume give the menu to compare.
In the window that appears on the screen, click the button NEXT, then use the field selected to indicate the amount of unallocated space to add to the partition and click first NEXT and then end but I will complete the procedure.
For the operation to be successful, the partition to be extended must be adjacent to the unallocated space in the partition scheme (i.e. in the graph with boxes at the bottom of the Disk Management window).
MiniTool Partition Wizard Free Edition
If the disk management utility included "standard" in Windows has not satisfied you and / or has returned error messages, you can turn to third-party solutions. Among the many available, I recommend you MiniTool Partition Wizard Free Edition, which is very simple to use, supports all major file systems, mechanical hard drives, SSDs and is free. A paid version is also available (usable for commercial purposes), which for $ 39 offers extra features like dynamic disk conversion and self-starting disk creation, but you shouldn't care for now.
To download MiniTool Partition Wizard Free Edition, then connected to the official website of the program and click on the button Download placed in the center of the page. Once the download is complete, start the executable pwxx-free.exe e, nella finestra che si apre, fai clic prima sul pulsado Yes and then OK.
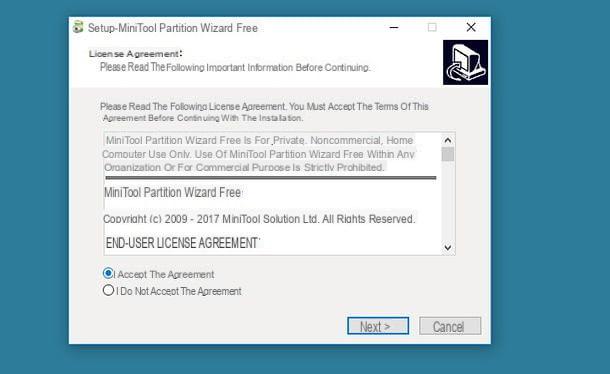
Then place the check mark next to the item I accept the agreement to accept the conditions of use of the software, and click on Next four consecutive times. Then remove the check from the options related to the installation of additional software (eg. Avast Free Antivirus) and finish the setup by first pressing on Next and then install e Finish.
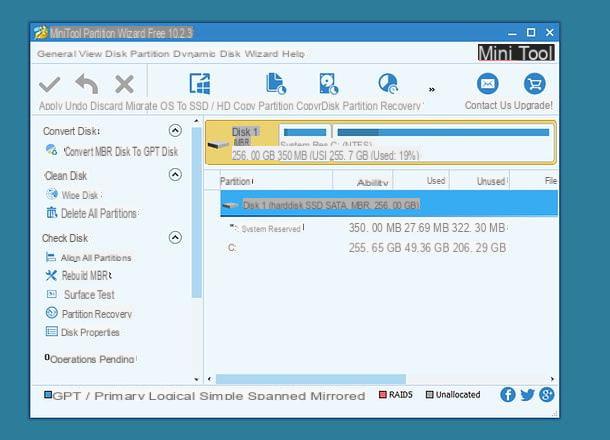
Now, to repartition your PC hard disk with MiniTool Partition Wizard Free Edition, start the program and click on the box MiniTool Partition Wizard Free.
In the window that opens, you will find a sidebar, on the left, with the list of all the operations that can be performed with the software and a list, in the center, with all the disks and partitions available. To modify a partition, all you have to do is select it and click on the operation you want to perform, choosing it from the left sidebar.
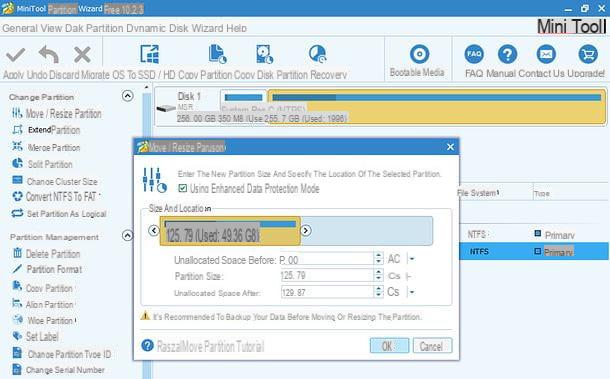
For example, if starting from the primary partition C: you want to create a new partition to dedicate to data, you must first reduce the size of the existing partition. Then click on the partition name C: and select the item Move / Resize partition from the side bar of the sinistra.
In the window that appears on the screen, use the indicators which are on either side of the graph or field Unallocated space after to indicate the space to reserve for the new partition and first click on OK (bottom right) and then up Apply (top left) e Yes (in the center of the screen) to apply the changes.
You will almost certainly be asked to restart your PC for the changes to take effect: accept by clicking on the button Restart now.
When you log into Windows again, launch MiniTool Partition Wizard Free Edition again and you will find some unallocated space (Unallocated) to use when creating a new volume.
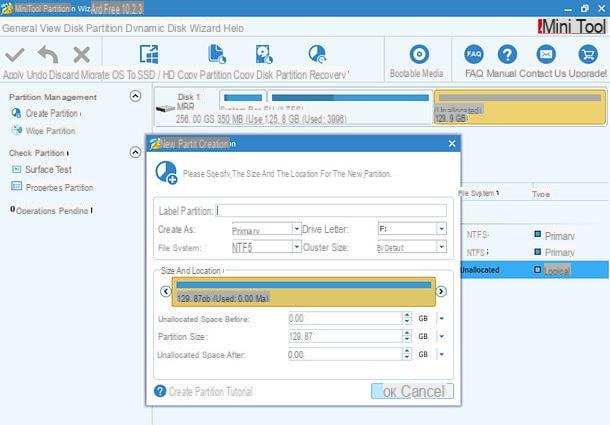
To create the new partition, select the entry Unallocated and click on the option Create partition located in the left sidebar. In the window that opens, type the name you want to assign to the partition in the field Partition label and make sure the graph Size And Location is set to use all unallocated space (in the Unallocated space after there must be value 0).
Then choose the File System with which to format the partition using the appropriate drop-down menu (I recommend NTFS if you intend to use the partition only on Windows or exFAT if you wish to share it with other systems, FAT32 it also offers wide compatibility with all systems but imposes a limit of 4GB per file), select the drive letter to be assigned to the volume via the drop-down menu Drive letter click her cousin OK and then Apply e Yes to save the changes and create the partition.
In case of second thoughts, to delete a previously created partition, select it from the main window of MiniTool Partition Wizard Free Edition, click on the item Delete partition present in the left sidebar and first presses the button Apply (top left) and then up Yes (in the center of the screen) to complete the operation.
You will get some unallocated space to reallocate to existing partitions (presumably C:). To do this, select the partition to which to add the unallocated space (ex. C:), click on your voice Extend partition present in the left sidebar and move the lever How much free space do you want to take? present in the window that opens towards the right end. To conclude, click on the button OK, its Apply and then Yes.
Partition hard drive on Mac
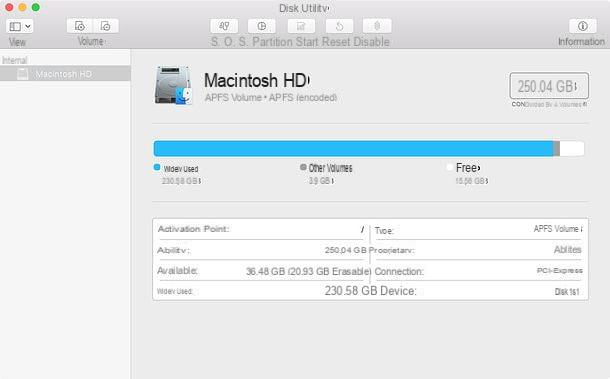
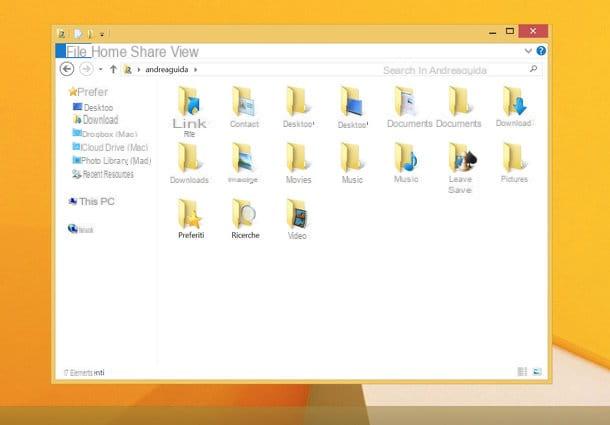
If you have one Mac, you can repartition the hard disk using Disk Utility, the application for managing disks and partitions included "standard" in macOS. To invoke Disk Utility, open the Launchpad (the rocket icon located on the Dock bar), open the folder Other and select the utility icon located in it. Alternatively, if you prefer, you can launch Disk Utility by searching for its name in Spotlight (the magnifying glass icon located at the top right of the menu bar).
Now, to create a new volume to store your data, select the name of your Mac's hard drive (ex. Macintosh HD) from the left sidebar, press the button Partition which is located at the top and choose how to proceed: you can create a new volume formatted in APFS (the most recent Apple file system) that shares the storage space with the primary partition of the disk or create a real disk partition.
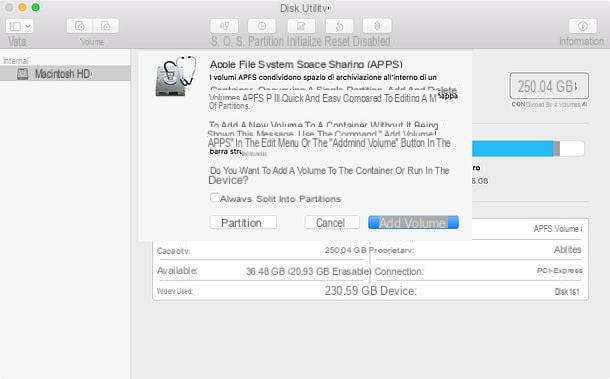
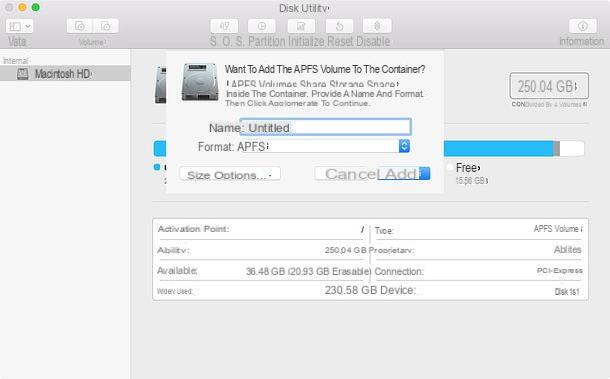
In the first case, click on the button Add volume and, in the window that opens, type the name you want to assign to it in the appropriate text field, make sure that the drop-down menu Size the file system is selected APFS and click on the button Add to complete the operation.
If you want, by clicking on the button Size options you can set the maximum size that the volume can reach and the disk space to be reserved for the latter (both are optional parameters since, as already mentioned, the APFS volumes share the storage space inside the container).
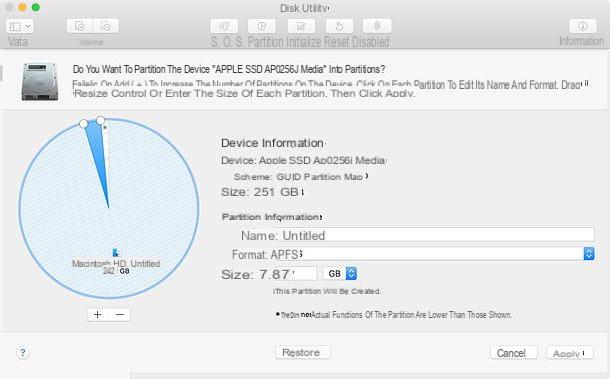
If you have chosen to partition the disk, click on the button first Partition and then on the button [+] present in the window that opens. Then indicate the amount of space to reserve for the new partition using the field dimensions (or the pie chart), type the name to be assigned to the volume in the appropriate text field, choose the file system with which to format it (eg. APFS o Mac OS extended) process the menu to tendin Size and click on the buttons Apply, Partition e Continue to complete the operation.
Since you're partitioning your Mac's main drive, the system may seem frozen for a few minutes - don't worry, it's normal.
Subsequently, in case of second thoughts, you can delete a previously created APFS volume simply by right clicking on its name (in the Disk Utility sidebar), selecting the item Delete APFS volume from the menu that opens and confirming.
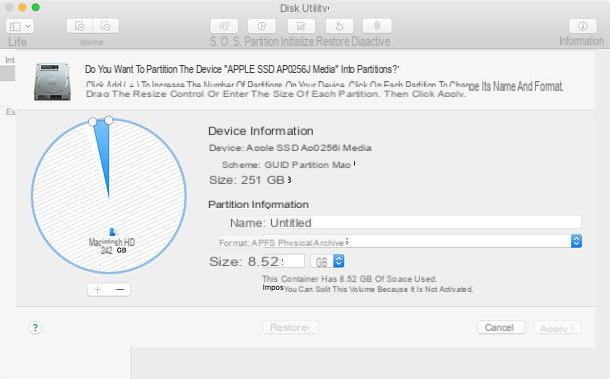
To delete a partition, however, you must select the name of your Mac's hard disk (eg. Macintosh HD) from the left sidebar and press the button Partition which is located at the top. In the next window, click on the button Partition, select the partition to delete from pie chart and delete it by pressing the button first [-] located at the bottom left and then on the buttons Apply, Partition e Continue.
Again, the same warning applies as before: since you're partitioning your Mac's main drive, your system may get stuck for a few minutes.
Other solutions to do the partitioning of the hard disk
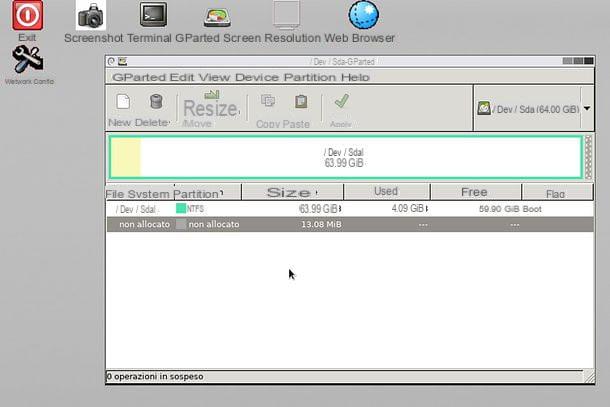
If the solutions listed above did not fully satisfy you and / or you are looking for a complete solution for partitioning hard disks, I highly recommend you try GParted: it is a Linux distro that must be run in live mode from CD, DVD or USB key and which, acting outside the PC operating system, allows you to freely manage all disk partitions.
It's completely free, supports all popular hard drives and SSDs, and is compatible with all major file systems. To use it, download yours ISO image and burn it to a floppy disk or USB key (following the instructions on this page). After obtaining the diskette or USB stick with GParted, boot from it (you may have to change the BIOS settings by changing theboot order and disabling the Secure Boot).
In the initial GParted menu, select the first option, then Don't touch keymap, the language number 14 (i.e. your language) and press Submit to access the actual partitioning tool. From here everything is very simple: selecting a partition from the distro menu and clicking on the button Resize / Move you can resize it by selecting some unallocated space and clicking on the button New you can create a new partition while pressing the button Delete you can delete the selected partition.
How to partition the hard disk