Open Broadcaster Software (free)
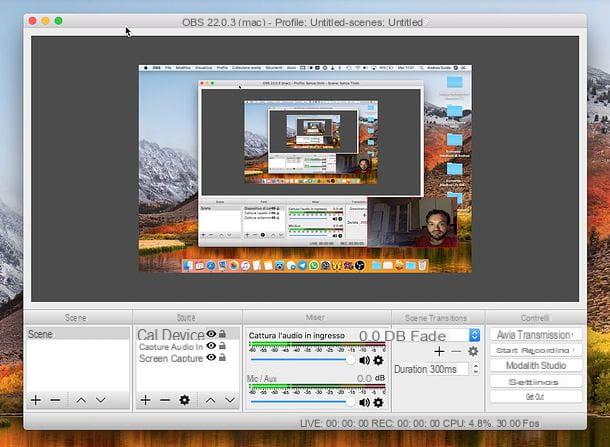
OBS (acronym for Open Broadcaster Software) is an excellent free and open source software that allows you to record (or broadcast "live") your computer screen. It is available for Windows, macOS and Linux and, among its main features, there are the extreme ease of use and the ability to include webcam footage in recordings.
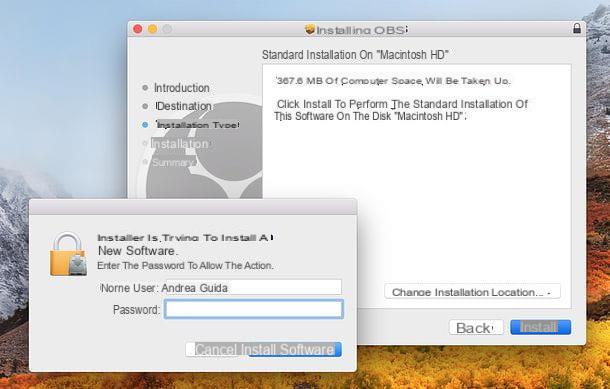
To download it on your Mac, connect to its official website and click on the button macOS 10.11+. A download complete, apri il .pkg file obtained from the site and, in the window that opens, first click on Continue twice in a row and then on Install. Then type the password of your user account on macOS (the one you normally use to access the system) and first click on Install software and then Close e Don't move it to conclude the setup.
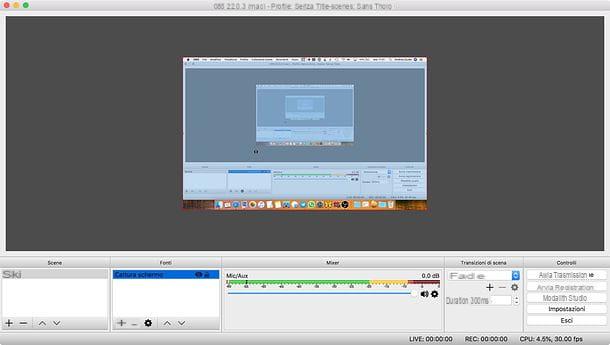
At this point, to record the screen of your Mac, start OBS and select the elements to capture, using the box References application. To proceed, click on the button + located at the bottom and select the item Screen capture from the menu that opens (to capture the computer screen).
Clicca, quindi, sul pulsating OK twice in a row (if you have more than one screen connected to your Mac, you can choose which screen to capture via the drop-down menu Display) and use the red border Mac screen preview to resize the screen area to be captured.
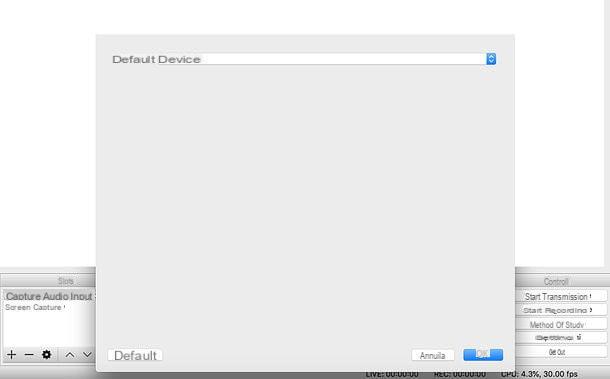
Once this is done, press the button again + located below the box References, select the voice Capture incoming audio from the menu that pops up and give OK for two consecutive times, in order to also capture the audio of the webcam.
If you have more than one audio input device connected to your Mac (e.g. a webcam and microphone), select the device to use via the drop-down menu Device.
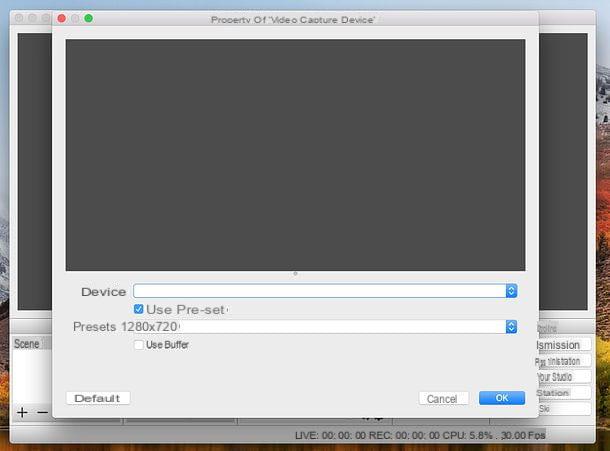
To also add the webcam shot to the elements to be captured with OBS, click the button again + below the box of sources and select the item Video cattura device give the menu to compare.
In the next window, click on OK, select the webcam name from the drop-down menu Device and click on OK to confirm. Then resize the red box by shooting the webcam (using the mouse) and move it to the point on the desktop where you want it to be placed.
Now we are! Click the button Start recording and register.
By default, OBS saves recordings in MOV. To change the output format, go to the menu Settings (by clicking on the appropriate button located at the bottom right), select the icon output from the left sidebar and choose a file type from FLV, MP4, MOV, MKV e TS give menu to tendin Registration form.
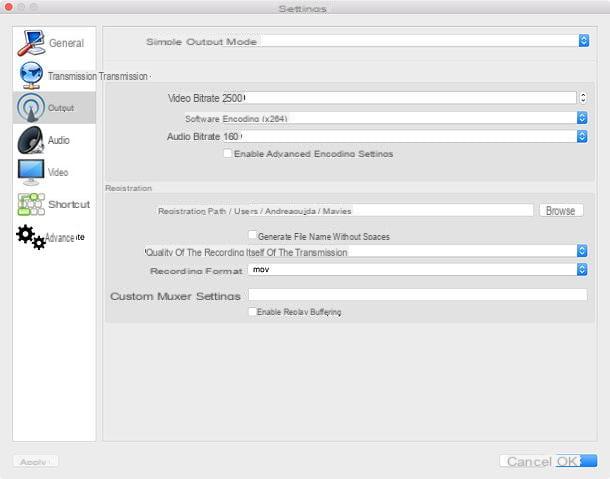
From the same menu, by clicking on the button Shop by Department, you can also choose the folder to save the videos recorded with OBS.
Screenflow (payable)
Screenflow is one of the best apps for record Mac screen, as well as one of the most used in the world. It also includes a handy editor that allows you to edit your recordings, add special effects to them and edit them in a very simple way. The software is paid, costs $ 129, but is available in a free trial version that has no time limits and watermarks recordings.
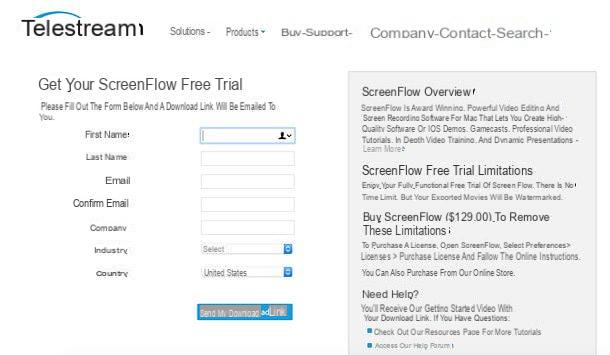
To download the free trial of Screenflow, connected to the website of the application, click on the button Download free trial and fill out the form that is proposed to you indicating, in the appropriate fields, First Name (first name), Last Name (last name), Email (to be repeated in the field Confirm email), Company (company you work for), Industry (sector in which you work) e Country (Country of Residence).
Once this is done, check the boxes for the items I have read the Terms of Service and agree, I certify that I am 16 years of age or older and click on the button Send my download link to start the Screenflow trial download.
A download complete, apri il dmg package which is automatically downloaded to your computer, click on the button Agree and trascina l'icona di Screenflow in the folder Applications say macOS.
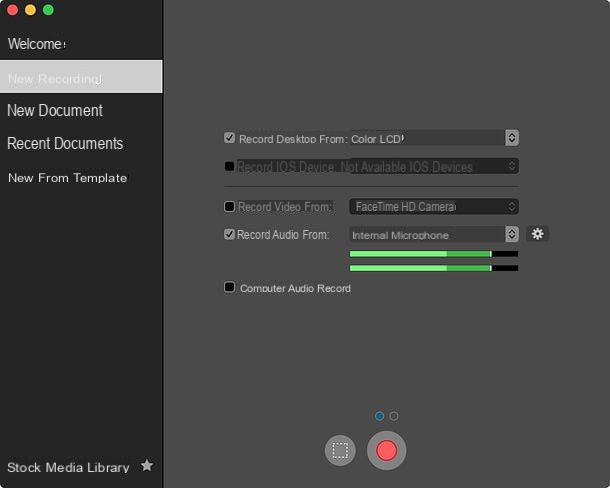
When the operation is complete, start Screenflow, click on the button apri, select the voice New recording from the window that opens (on the left) and set up your registration. Then select the screen to record from the drop-down menu Record desktop from, metti il segno di spunta accanto alla voce Record audio from to also capture the audio of the microphone (i.e. of the webcam) and, if you also want to activate the recording of the webcam, put the checkbox next to the option Record video from.
At this point, pigia sul pulsating REC and register. Then click on the Screenflow icon located at the top right (next to the system clock), select the item Stop record from the menu that appears and that's it.
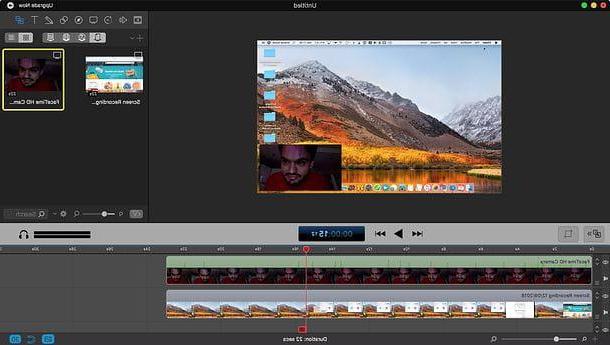
Finally, edit the video with the Screenflow editor (which will automatically open when recording is complete) and export your video by selecting the item Export from the menu Fillet of the program. You will be able to choose between various file formats and various resolutions.
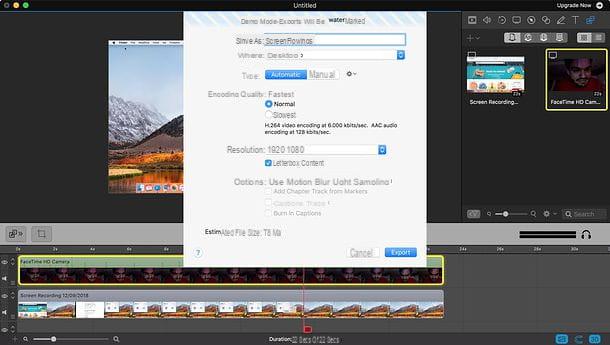
It is important to underline that the Screenflow editor allows you to act individually on the various recorded streams, therefore on the screen recording, on the audio track and on the webcam shooting. The latter, then, can be freely moved and resized by selecting it directly in the video preview.
Screencast-o-matic (freemium)
Screencast-o-matic is a very popular online desktop registration service. It works directly from the browser through the use of a small free app, which is available for both Mac and Windows. It is free, but it has some limitations: it does not allow you to make recordings longer than 15 minutes, it produces videos with a maximum resolution of 720p and watermarks the recordings. To remove these limitations and also get more functions, many of which are dedicated to editing the video products, you need to subscribe to paid plans, which start at $ 1,50 / month.
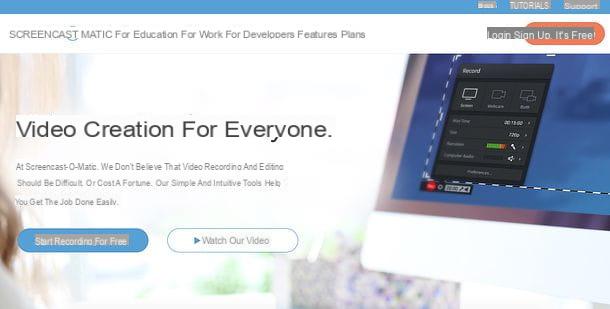
All clear? Well, then let's take action: to use Screencast-o-matic, connect to its main page and first click on the button Start recording for free, by your complaint Launch free recorder and, finally, on the voice Download launcher: in this way, the “little program” that allows you to record the computer screen will be downloaded to your computer.
A download complete, apri il dmg package which contains the Screencast-o-matic launcher, double-click the executable Screen Recorder Launcher Setup contained in it and first click on apri and then OK to conclude the setup.
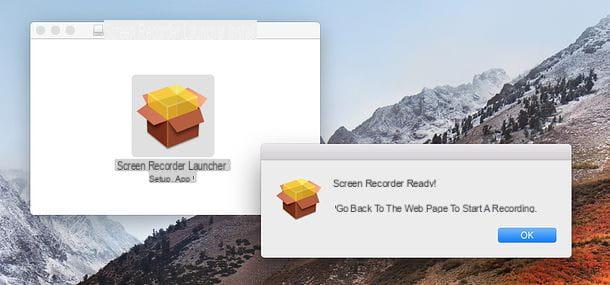
Now, go back to the Screencast-o-matic home page, click on the item try again and click on Allow e apri to invoke the registration utility.
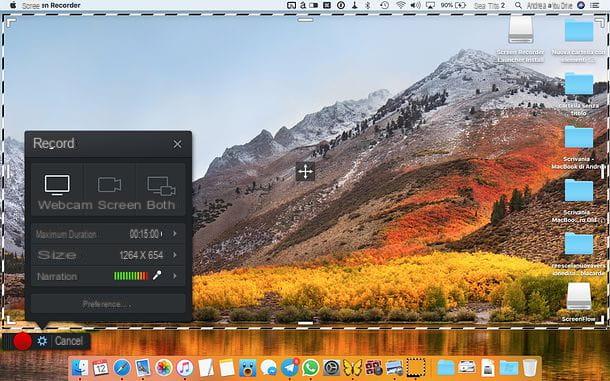
A black box will open in which you can choose whether to record Screen, Webcam o Bothby clicking on one of the appropriate buttons available. You can also choose whether or not to activate the narration, that is, the capture of microphone audio, and the size (i.e. the resolution) of the video to be generated.
By clicking on the button instead Pref Renze, you can set keyboard shortcuts, recording preview settings and other useful parameters. Once you've set your preferences, click the button Reclocated at the bottom left and register.
To stop recording and save the videos made with Screencast-o-matic on your computer, first click on the button (II) placed in the lower left and then up Done.
Then use the service editor to delimit the start and end points of the video to export (the two white indicators found on the sides of the timeline), add background music (the icon of the music note) and captions (the CC) and start exporting the movie by clicking on the item first Save as a video file and then Public.
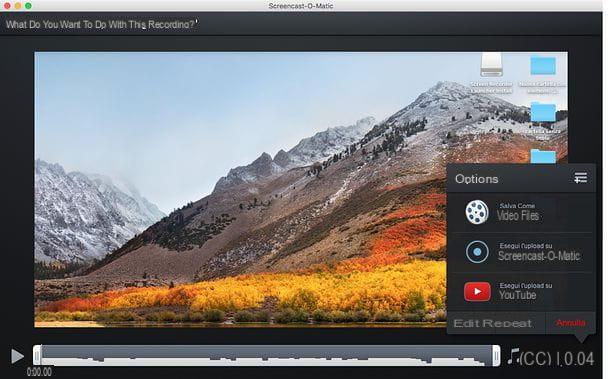
Alternatively, if you prefer, you can also post the video on YouTube or on the website of Screencast-o-matic, using the appropriate items at the bottom right of the editor.
QuickTime Player (free)
QuickTime Player it needs no introduction. This is the video player included by default in macOS, but perhaps not everyone knows that it is capable of either record Mac screen or to make recordings of webcam footage. Unfortunately it cannot do both at the same time, but with a little “trick” you can somehow overcome this limitation as well.
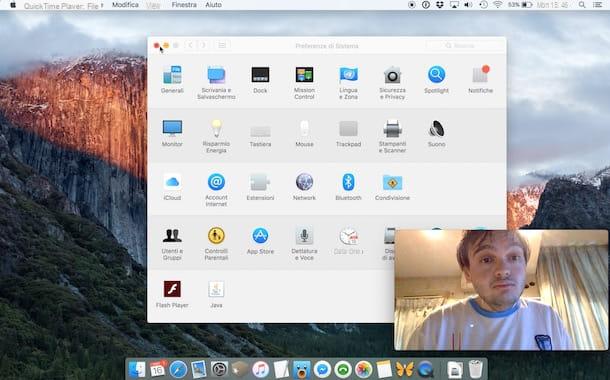
The procedure to follow is quite simple: after starting QuickTime Player, right click on its icon in the Dock bar and launch a New movie recording by clicking on the appropriate item in the menu that opens. A box will appear showing the webcam in real time.
At this point, resize the box and place it where you prefer on the screen. Then right click on the QuickTime Player icon again, select the item New screen recording from the menu that opens and starts a new screen recording also activating the audio capture (by selecting the item Integrated microphone from the menu that appears by clicking on the arrow located next to the button Rec).
With this ploy you will get a desktop recording with built-in webcam shot. But be careful, unlike Screenflow, OBS and Screencast-o-matic, the webcam shot will not follow the recording. This means that it will be covered by the windows you open and will disappear when you switch to another desktop or a full screen application.
Once registration is complete, click on the button Stop present at the top right of the macOS menu bar (next to the system clock). Then, if you want, use the editing tools in the menu Modification (Eg. Split clips, Turn left, Rotate to the right etc.) to edit the video and export the final result by selecting one of the file formats available in the menu File> Export As located at the top left.
Screenshot
If you are using a macOS version 10.14 or later (Mojave), you can also record the Mac screen with Screenshot, the updated version of the historic screen capture tool integrated into the Apple operating system.
To bring up the screenshot, select the application icon from the folder Other of Launchpad or press the key combination cmd + shift + 5 on the keyboard: this will open a toolbar with various buttons. The buttons dedicated to making videos are the fourth and fifth: one allows you to capture the entire screen of the Mac, the other a portion of it (to be selected with the mouse).
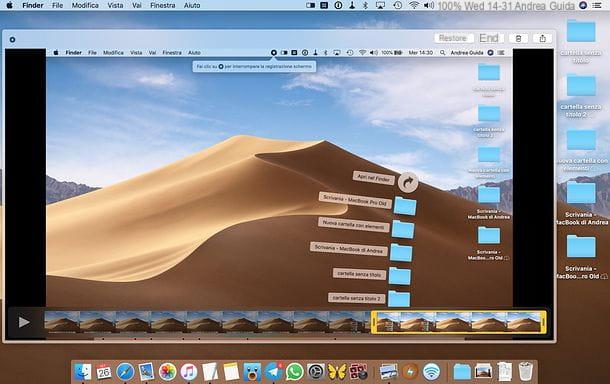
Once you have chosen the option you prefer the most, then click on the button Register and make your video. Once the registration is complete, click on the button Stop appeared in the meantime in the macOS menu bar (top right, next to the system clock) and the movie will be automatically saved in the folder where the screenshots are also saved (by default, the desktop).
If you want, at the end of the recording, you can cut your video, share it or trash it by clicking on its miniature that appears in the lower right corner of the screen. Once the thumbnail has been selected, choose the operation you want to perform from the window that opens, using the toolbar located at the top: the icon with the film and the two side indicators allows you to trim the video, the square with arrow inside allows you to share it, while the Trash can to delete it. Once you have made the desired changes, to save the video, click on the button end.
How to Record Screen Mac


